And here’s my talk about using RepRap 3D Printing for basic research in Regenerative Medicine. Thanks again to the awesome members of Hive76, especially Chris Thompson and Rob Vlacich.
Modified MendelMax #2 was born today. Isn’t she purty. This bot is gonna live at Hive76 for the forseeable future.
Thanks to all at Hive76 for help and support during this build, especially to Rich and Andy for hanging tough in the trenches, Chris and Brendan for troubleshooting and tools, and Morfin for extra supply bits.
We’ve got big plans for this bot. Stay tuned. And here’s a video of the first print!
anointed Hive76 as the most organized hacker space he’s seen. Quartermaster Brendan took appropriate pride in the observation.
Mitch basically talked about the Maker/Hacker movement in general, showed some of the kits that were keeping him company on the train, and weaved it all in a thematic web reminiscent of Arlo Guthrie’s is-this-guy-rambling-no-holy-shit-he’s-a-genius-because-it-all-makes-sense-in-the-end style.
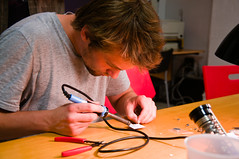
After that, everyone bought a kit or two and lost themselves in the task of soldering. I don’t know whether it’s the solder fumes or just the act of soldering itself, but I felt pretty good at the end of it all.
The new space is completely awesome and turned out to be nearly perfect for the event. Hats off to Brendan, Robert, PJ and Jordan!
One of our core members, Jordan Miller, has just published a scientific paper using RepRap 3D printing technology to engineer living tissues for regenerative medicine. I’ll give you a rundown of the science and a step-by-step guide of how Jordan got to this great spot in his career. Jordan is quick to point out that this is work that would not have been possible 5 years ago, or without the help of RepRap, Hive76, and this wonderful city of Philadelphia.
There are other labs around the world that are attempting what Jordan and the rest of the team at UPenn and MIT have been working towards. The end goal of regenerative medicine research is engineered tissues and replacement organs for treatment of human disease. As Science news says,
Imagine a world where if your heart or kidneys failed, you wouldn’t have to endure an agonizing, possibly futile wait for a donor whose organ your body might reject. Instead, a doctor would simply take cells from your own body and use them to “grow” you a new organ.
Other lines of research are attempting to 3D print directly with living cells and gel. These so-called “bioprinting” approaches involve loading cells and gel in syringes to be used as feedstock to create a structure from scratch. The problem is that healthy liver cells, for example, usually die of starvation (lack of nutrients) and suffocation (lack of oxygen) while enduring the slow 3D printing process.
Jordan’s 3D printed vasculature approach was inspired by whole organ vascular casts like this one.
Enter Jordan and his innovation: since vasculature provides the lifeblood to resident cells, why not focus on the vasculature first?
Jordan and the rest of the research team at UPenn and MIT have developed a new way to create vasculature for living tissues. This 4 step process involves: 1) 3D printing a network of sugar filaments, 2) surrounding it with living cells in a gel, 3) dissolving away the sugar to leave behind a vascular network for 4) the delivery of nutrients and oxygen. He accomplished this with a custom built 3D printer, extruder and control software.
Here’s a step-by-step of Jordan’s many year process:
Get a crazy idea to link sugar and vasculature when comparing the interior of a 3D print to a capillary network.
You can read the Penn press release about this awesome science, an overview from Science News, or the full paper. A more detailed post about the hardware used in this project will follow and soon you’ll be able to make your own sugar extruder. (It prints chocolate too!)
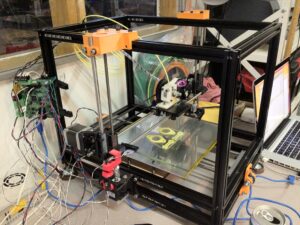
Last Night We started the build of another one of these box-modded MendelMax printers. With extra hands we got the whole frame, the feet, all the motors, and a large number of brackets mounted and aligned in just a few hours. Even Morfin was surprised how quickly it all came together.
This design has already led to the design of the first printable upgrade: Compact Y-Rod holders. As you can see, this part was derived from MendelMax 1.0, 1.5, and some awesome rod clamps by Jonas Kuehling.
Now the build volume actually surpasses a MendelMax, sitting at 265x247x220 mm. And see how flat those 0.4mm printed layers are? That’s because this aluminum bot is super rigid, giving fast and accurate prints. Sweet!
If you can come up with a good name for this bot, I’d definitely appreciate it. Post in the comments if you feel inspired.
Well, hot on the heels of our last RepRap MendelMax Build, I’ve been able to redesign the MendelMax to be a rigid rectangle… the upshot is the build volume is increased (especially in Z) without the footprint increasing. The build volume of this baby is 265x233x190 mm (or ~10″x9″x7.5″). The build assembly goes much faster, too.
Here’s a video of this box design Modified MendelMax printer on it’s first print. It’s been chugging along for a solid few days now, no problems so far. It’s printing so well, it’s time to build another one. Come join us!
You may have heard of the Arduino microcontroller before, but if not, we’re here to tell you all about it! This class will be geared towards those that have no experience with programming, microcontrollers, electronics, or even hackerspaces! Rest assured that those with some deeper digging questions will have knowledgeable members of Hive76 on hand to answer them.
With the purchase of a ticket, you will get 12 hours of instruction spread over 4 class sessions (that’s 4 three-hour sessions) and an Arduino “starter kit” of parts. You have the option of bringing your own Arduino ($55), if you have one, or choosing the package that comes with the Arduino ($75).
Sessions start on June 3rd and continue each Sunday, through June 24th. Class times are 1PM-4PM. Students must bring a laptop with a USB port (Windows, Linux, OS X), and a willingness to have fun.
Tickets can be purchasedhere. To clarify, students only need to purchase one ticket to attend all four classes.
Seating is limited to only 10 students! Tickets are expected to go VERY fast!
We got Matt Wettergreen’s MendelMax up and printing in two days. Thanks to all those at Hive76 who helped out with the build, especially Chris, PJ, Brendan, and Rob! Here’s a timelapse from the first day:
Below is a video of the finished bot printing with the latest Marlin firmware (smooth acceleration and fast travel times)! It turns out PLA sticks to a heated aluminum bed provided in the MendelMax kit. Wow. Completely Awesome. I couldn’t believe how little of the heat from the aluminum bed actually radiates away (you can only barely feel the heat an inch off the bed at 75 degrees celsius). That’s a huge feature.


 Modified MendelMax #2 was born today. Isn’t she purty. This bot is gonna live at Hive76 for the forseeable future.