

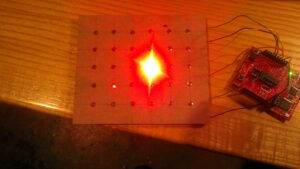
 This 5×6 LED tile is a key component in a secret project that I’m developing (in secret) with some other folks (whose names shall remain a secret).
Why be so public about something so secret? Because this tile uses a layout technique that lets you build charlie-plexed LED arrays quickly and cheaply — and that’s something worth sharing.
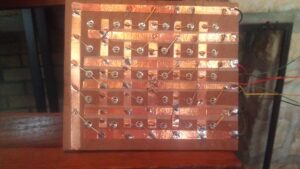 You need to flip the tile over in order to see what’s special about it. Here’s a quick list of features that make the assembly what it is:
- The back of the tile has six “column” conductors and six “row” conductors.
- These column and row conductors are connected along the diagonal of the row/column array. At all other points in the matrix, the row and column conductors are isolated via a layer of masking tape.
- LEDs above the diagonal have their cathode connected to the conductive row immediately above the LED. LEDs on or below the diagonal have their cathode connected to the conductive row immediately below the LED.
- All LEDs have their anode connected to the column that is to their immediate left.
The resulting circuit allows you to individually address any of the thirty LEDs in this 5×6 matrix using only six lines from a micro-controller.
It turns out that this assembly technique is pretty quick. It’s also physically robust. Best of all, it’s cost effective — copper tape is relatively inexpensive and masking tape is downright cheap. To get some perspective on how this compares to other assembly techniques cost-wise, go price a custom printed 4.5″ x 5.25″ circuit board.
This technique can be used to assemble arbitrarily large tiles. In fact, the larger the tile, the more effective the technique is with regard to saving time and money. And, as a fortunate coincidence, most peg-boards happen have 5mm holes — so that means you buy the peg-board at the hardware store and jam LEDs in there perfectly w/o any drilling whatsoever — so just buy the panel, tape it up, jam in the LEDs, solder the leads and enjoy the show …