I met Zach Hoeken Smith at one of my first Hive76 events. I donated to the pledge drive to buy a MakerBot Cupcake CNC and extruder. Once the drive was successful and 3DPO built, Hive76 held a workshop to learn how to design and print with SketchUp and the MakerBot. Our instructor was MakerBot co-founder Zach himself. Afterwards, everyone went out to West Philly for some Ethiopian food. It was a nice time. I haven’t seen him since, so I was surprised to hear from fellow member Jordan Miller that Zach had left Makerbot and was living in China. I reached out to Zach for a chat and here’s what I learned about my favorite hardware innovator. Continue reading “Exclusive: Zach Hoeken on leaving MakerBot and his future.”
How to: Innovate in Science with Open Source Technology
One of our core members, Jordan Miller, has just published a scientific paper using RepRap 3D printing technology to engineer living tissues for regenerative medicine. I’ll give you a rundown of the science and a step-by-step guide of how Jordan got to this great spot in his career. Jordan is quick to point out that this is work that would not have been possible 5 years ago, or without the help of RepRap, Hive76, and this wonderful city of Philadelphia.
There are other labs around the world that are attempting what Jordan and the rest of the team at UPenn and MIT have been working towards. The end goal of regenerative medicine research is engineered tissues and replacement organs for treatment of human disease. As Science news says,
Imagine a world where if your heart or kidneys failed, you wouldn’t have to endure an agonizing, possibly futile wait for a donor whose organ your body might reject. Instead, a doctor would simply take cells from your own body and use them to “grow” you a new organ.
Other lines of research are attempting to 3D print directly with living cells and gel. These so-called “bioprinting” approaches involve loading cells and gel in syringes to be used as feedstock to create a structure from scratch. The problem is that healthy liver cells, for example, usually die of starvation (lack of nutrients) and suffocation (lack of oxygen) while enduring the slow 3D printing process.

Enter Jordan and his innovation: since vasculature provides the lifeblood to resident cells, why not focus on the vasculature first?
Jordan and the rest of the research team at UPenn and MIT have developed a new way to create vasculature for living tissues. This 4 step process involves: 1) 3D printing a network of sugar filaments, 2) surrounding it with living cells in a gel, 3) dissolving away the sugar to leave behind a vascular network for 4) the delivery of nutrients and oxygen. He accomplished this with a custom built 3D printer, extruder and control software.
Here’s a step-by-step of Jordan’s many year process:
- Get a crazy idea to link sugar and vasculature when comparing the interior of a 3D print to a capillary network.
- Get a PhD in bioengineering
- Move to Philadelphia
- Join a hackerspace
- Get introduced to 3D printing, MakerBot and RepRap
- Assemble your first MakerBot
- Invent a heated build platform to dry your sugar while printing.
- Add a heater to the Frostruder so you can print molten sugar.
- Assemble a customized RepRap Mendel that fits your new extruder.
- Get help from your hackerspace to properly control your pneumatic extrusion.
- Work for months perfecting recipes and methods for printing vasculature.
- Write it all up in a research paper and submit!
You can read the Penn press release about this awesome science, an overview from Science News, or the full paper. A more detailed post about the hardware used in this project will follow and soon you’ll be able to make your own sugar extruder. (It prints chocolate too!)
RepRap with Aluminum Extrusions == WIN
Last Night We started the build of another one of these box-modded MendelMax printers. With extra hands we got the whole frame, the feet, all the motors, and a large number of brackets mounted and aligned in just a few hours. Even Morfin was surprised how quickly it all came together.
This design has already led to the design of the first printable upgrade: Compact Y-Rod holders. As you can see, this part was derived from MendelMax 1.0, 1.5, and some awesome rod clamps by Jonas Kuehling.
Now the build volume actually surpasses a MendelMax, sitting at 265x247x220 mm. And see how flat those 0.4mm printed layers are? That’s because this aluminum bot is super rigid, giving fast and accurate prints. Sweet!
If you can come up with a good name for this bot, I’d definitely appreciate it. Post in the comments if you feel inspired.
Philly Tech Week – We’re Booked Solid
Monday – MMMM Microcontroller Madness
Tuesday – DIY Music Night
Wednesday – Open House
Thursday – Game Night Featuring Tetris Arm Wrestling Tournament
Friday – PTW Gala demonstration (offsite)
Events at Hive76 Monday through Thursday start at 7pm and
ARE OPEN TO THE PUBLIC.
Friday Gala Ticketing information available here.
Timelapse: Building a RepRap MendelMax 3D Printer
We got Matt Wettergreen’s MendelMax up and printing in two days. Thanks to all those at Hive76 who helped out with the build, especially Chris, PJ, Brendan, and Rob! Here’s a timelapse from the first day:
Below is a video of the finished bot printing with the latest Marlin firmware (smooth acceleration and fast travel times)! It turns out PLA sticks to a heated aluminum bed provided in the MendelMax kit. Wow. Completely Awesome. I couldn’t believe how little of the heat from the aluminum bed actually radiates away (you can only barely feel the heat an inch off the bed at 75 degrees celsius). That’s a huge feature.
Congrats to the Mike Payson and the MendelMax Team on their inspired Mendel remix. It’s a fantastic RepRap 3D Printer.
We the People
3D Printer – MendelMax RepRap Build Day – Sat. March 3rd
This Saturday we’ll have Matthew Wettergreen here from Rice University to learn together how to build a MendelMax 3D RepRap printer.
MendelMax is the new rapid-to-assemble Mendel variant based on an extruded aluminum frame. Very rigid, very nice looking. Stop on by to check it out!
11 am – 8 pm
Saturday March 3rd @ Hive76
My Blade mCP X Mods

I’m a noob when it comes to RC helicopters. I got a Syma S107 for about $30 a year or two ago and it is incredibly stable while being ridiculously bulletproof. I can fly it into walls, and I’ve never replaced a part. If it’s laying on its side on the floor, I can often get it to right itself by just gunning the throttle. (Do I recommend it? No. Do I do it? Sometimes.) A wire fatigued off the board once but that was the only thing I’ve had to fix. It’s a hell of a bargain and it’s treated me great, but being so stable and easy to fly, it has some inherent performance limitations. So I decided to step up a few levels.
I heard about the Blade mCP X helicopter, the first “real” helicopter of its size that came stock with 3-axis attitude-holding stabilization electronics. It weighs maybe double what my S107 does but its performance is amazing. It can do inverted flight, flips, all sorts of crazy stuff. That is, when supplied with an appropriately-skilled pilot, which I certainly am not. But I can fly it in my backyard in 30 mph winds, and this little beast can take it — pretty impressive for something that weighs the same as a good quality 9V battery. Being such a noob, I crash constantly, but I can usually patch things up without needing to buy replacement parts. Here is the list of mods I’ve performed on my helo so far, mostly out of necessity:
- Grommet mod – tightens up the swash, reduces vibration (not my idea). Works great
- Tail boom from mCP X2 – comes with a more aggressive tail rotor which helps with yaw authority
- Created a simple tool to speed up resetting the main gear after crashes – just remove the battery and push this drilled-out rod over the gear hub to click it back in place, no need to remove the canopy or landing gear. I keep it zip-tied to my transmitter since I crash a lot 🙂
- Lengthened tail boom – added perhaps 1/2″, seems to help with yaw authority
- Added magnetic breakaway tail boom mount – after a crash the tail boom pops off instead of breaking, can be reset by simply moving it back in place and letting the magnets lock it down. Works very well, but be careful because if you have too much slack then with the right kind of crash the tail motor wires can get wrapped around the head. I’m sure I’ll keep experimenting with this one
- Masking tape holding my canopy together? Classy
- Hot glue holding my landing gear together? Not perfect by any means, but it keeps me flying until I buy a spare

Open call for help from ESR

Eric S. Raymond has recently asked for some help from Philadelphia’s DIY and engineering community with an exciting project. Amongst many other interesting projects, ESR is the lead developer on GPSd, a “service daemon that monitors one or more GPSes…”. He needs help building a cheap GPS repeater to forward the RF data from his roof antenna to his test rack in his office. For any student or hobbiest electrical engineers looking to make a name for themselves, this could be an excellent opportunity.
Maker Collider Event with NextFab Studio: TUESDAY

Join us on TUESDAY, December 20th, 7 pm – Midnight
Meet-and-Make, Hive76 and NextFab Studio Members
@ http://NextFabStudio.com/ @ 3711 Market Street
This “Maker Collider” event will be a great opportunity to make awesome stuff.
We had proposed these projects:
All details are here on the Wiki
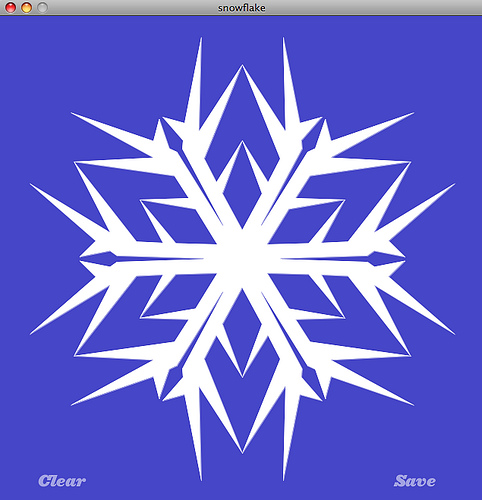
After reviewing the projects here and those proposed by NextFab members it sounds like we will be doing some form of the Chess boards, the snowflakes, some robotics, and a bunch of laser-engraving. But what if you don’t like those? Come by anyway and you can rally troops for helping you on your own project(s).
NextFab Studio will have these staff members on hand throughout the event:
Chrinstine : Textile and Industrial Design ( fabric knowledge, product design,cad, sewing )
Ian : Electronics (pcb design/fabrication, coding, wiring, soldering, etc.)
Seth : Mechanical Engineer (handtools, cad, product design)
Brandon : Multi-Media Designer ( 3d printing, graphic design, product design, cinematography, cad)
Anything you want to do, you can do. AWESOME.
Check out all their equipment.
Oh, and there will be food too. Be there at 7 pm!!


